1. Measure around the plumbing first
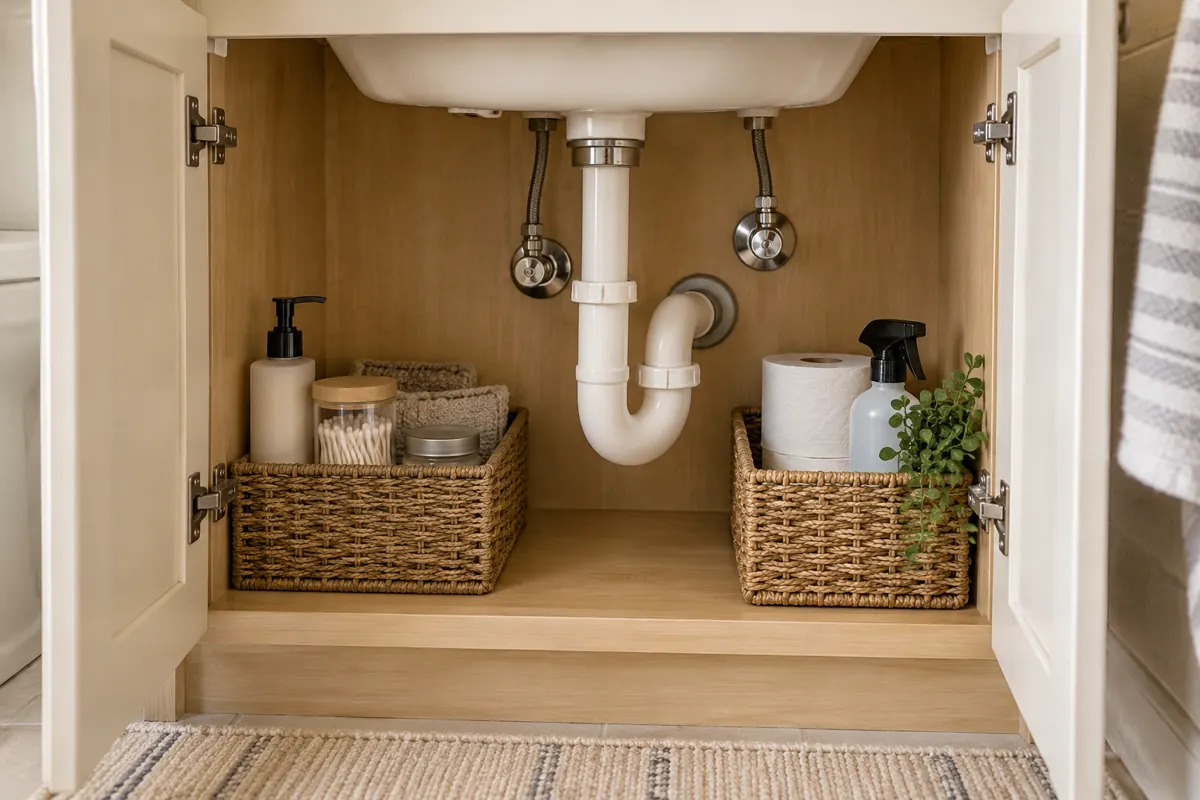
Measure the cabinet opening, usable width, depth, and height. Then note the location of the drain pipe, P-trap, water supply lines, and shutoff valves. Do not treat the cabinet as one large rectangle. The plumbing creates several smaller usable zones, and those zones are what you should organize.
- Check how far the drain pipe extends into the cabinet.
- Make sure shutoff valves can be reached without moving several containers.
- Check door and hinge clearance.
- Confirm that a drawer, bin, or shelf can pass through the cabinet opening.
- Note the lowest point of the plumbing so nothing presses against it.
2. Check for moisture before adding storage
Before putting anything back, wipe the cabinet clean and look for damp areas, staining, swollen material, or signs of an active leak. If you find a leak, deal with the plumbing problem before adding organizers. Storage should never hide a leak or make shutoff valves difficult to reach. A washable tray or liner can make small spills easier to spot and clean, but it should not conceal moisture underneath it. Check the cabinet periodically.
3. Build zones around the pipes
Use smaller zones rather than forcing one large organizer around the plumbing.
- Front left: everyday toiletries.
- Front right: hair or grooming supplies.
- Back corner: unopened backups.
- Separate secured area: cleaning products, if appropriate.
- Keep clear space around valves and pipes.
4. Use two small bins instead of one large organizer
Two small bins often fit around plumbing better than one wide container. They are easier to remove when plumbing access is needed. Use containers you already own first. Keep labels simple: Daily, Backups, Hair, Cleaning.
Explore more affordable storage ideas for small apartments before buying an organizer.
5. Keep daily essentials near the front
Frequently used morning and evening products should be easiest to reach. Put them in one front tray or bin and move occasional items or unopened duplicates farther back or elsewhere.
Use the small bathroom organization guide for renters to plan the rest of the room.
6. Use vertical space only when plumbing allows it
A freestanding shelf insert may create a second level only where there is enough clearance around plumbing, valves, hinges, and the sink basin. Do not wedge storage against plumbing or block a shutoff valve.
7. Choose open-front access for items you use often
Open-front bins, shallow trays, or removable baskets may be easier to maintain than complicated multi-tier systems in very small cabinets.
8. Separate backups from open products
Group unopened backups separately. If the bathroom is humid or crowded, store backups elsewhere in a dry location. Medicines should be stored according to their labels rather than assuming the bathroom is suitable.
9. Store cleaning products carefully
Follow product labels, keep incompatible cleaners separate, and never transfer cleaners into unmarked containers. If children or pets are present, cleaning products should be secured appropriately and kept out of reach. If the cabinet cannot be made safe, choose another storage location.
10. Keep the plumbing access zone empty
Leave enough room around shutoff valves and plumbing connections for quick access and leak inspection. Some intentionally empty space is functional.
What to avoid under a bathroom sink
Avoid storage choices that make the cabinet harder to inspect, clean, or access.
- Organizers that block valves or pipes.
- Heavy stacks that must be removed for plumbing access.
- Cardboard in damp or leak-prone areas.
- Products pressed against plumbing.
- Mixed cleaning products and toiletries without separation.
- Buying multi-tier storage before measuring.
- Adhesive or mounted storage without checking surface, instructions, and rental restrictions.
Renter-friendly under-sink organization
Prioritize removable storage that does not alter the cabinet. Check the lease before permanent changes. No-drill does not automatically mean damage-free; follow manufacturer surface, load, and removal guidance.
Read the renter-friendly no-drill storage guide for surface and installation checks.
A simple under-sink reset
Use this quick reset whenever the cabinet starts to feel crowded again.
- 1. Remove empty packaging.
- 2. Return daily items to the front zone.
- 3. Group backups together.
- 4. Check for leaks or moisture.
- 5. Make sure valves remain accessible.
- 6. Remove products no longer used.
Under-sink organization checklist
Before calling the cabinet finished, check that it stays easy to use and inspect.
- Shutoff valves are accessible.
- Nothing presses against plumbing.
- Daily items are easy to reach.
- Backups are grouped separately.
- Cabinet doors close freely.
- Containers can be removed without dismantling the setup.
- Cleaning products are stored safely.
- Leaks or moisture are easy to inspect.
- No unnecessary organizer purchases were added.
Final takeaway
A small bathroom cabinet does not need to hold everything. The most useful setup works around the plumbing, keeps the front area simple, and leaves enough room to reach valves and spot leaks. Measure first, reuse a container if it fits, and only buy an organizer when you can name the specific problem it needs to solve.